
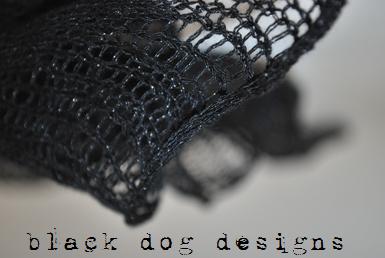
Yarn –700g wool (100g = 210y/192m), silk, cotton or any yarn that gives you the following tension over 1 inch of Stocking stitch:
Tension
6mm (US 10) needles – 1 inch: 5 sts and 5 rows
8mm (US 11) needles – 1 inch: 3 sts and 4 rows
Length 70cm (27.5 in)
Width (across hem) 66cm (26in) – this is the widest part
Sleeve length 42 cm (16.5in)
Abbreviations
KFB an increase made by knitting into the front and back of the same st.
Using 8mm (US 11) needles, CO 80 sts and work 1 row in K1, P1 rib.
Next row (RS) P
Next row K
Rep these two rows until piece meas approx 13 cm (19 k rows), ending with a P row facing.
Shape body
Next row P3, P2tog, P to last 5 sts, P2tog tbl, P3
Rep this row every 8 (or so) rows until 5 sts have been dec’d per side (10 total sts)… 70 sts
Change to smaller needles and cont in reverse stocking st for 12 rows.
Cast off 4 sts at beg of next two rows… 62 sts
Dec 1 st at end of next 6 rows… 50 sts
Cont straight for 42 rows, ending with a P side facing.
Cast off all sts in K st
Front RS
Using 8mm needles, CO 50 sts and work 1 row in K1, P1 rib.
Next row P
Next row K
Rep these two rows until piece meas approx 13 cm (19 k rows) ending with a P row facing (as for the back).
Next row P to last 5 sts, P2tog tbl, P3.
Rep this row every 8 (or so) rows until 5 sts have been dec’d on ONLY ONE SIDE -- the side where your seam will be… 45 sts.
Cont until the front piece is equal with the back (approx 56 P rows) ending with a P row. Change to smaller needles. Cont in reverse st st for 4 – 5 more rows.
Next row P to last 5 sts, P2tog tbl, P3
Next row K
Begin neck shaping – start your button hole here (optional) – I used a button and snap fastener. Next row P2tog, P to end
Next row K
Rep these two rows 3 times more – or until you’ve worked 15 P rows (in total) from when you changed needles.
Begin shaping armhole AT THE SAME TIME as you’re shaping the v-neck.
Shape armholes
Cast off 4 sts at beg of next K row
Next row P2tog, P to end
Dec 1 st at beg of next 6 K rows…
Cont straight (dec ONLY at neck-line) for 16 more rows and then cont dec ONLY every 2nd row.
Cont in this manner for 56 rows from where you changed needles, ending with a P side facing.
Cast off rem sts in K st
Front LS
Using 8mm needles, CO 50 sts and work 1 row in K1, P1 rib.
Next row P
Next row K
Rep these two rows until piece meas approx 13 cm (19 k rows) ending with a P row facing (as for the back).
Next row P3, P2tog, P to end.
Rep this row every 8 (or so) RS rows until 5 sts have been dec on ONLY ONE SIDE -- the side where your seam will be… 45 sts.
Cont until the front piece is equal with the back (approx 56 P rows) ending with a P row. Change to smaller needles. Cont in reverse st st for 4 – 5 more rows.
Next row P3, P2tog, P to end.
Next row K
Begin neck shaping
Next row P to last 2 sts, P2tog
Next row K
Rep these two rows 3 times more – or until you’ve worked 15 P rows (in total) from when you changed needles.
Begin shaping armhole AT THE SAME TIME as you’re shaping the v-neck.
Shape armholes
CO 4 sts at beg of next P row, P to last 2 sts, P2tog.
Next row K
Dec 1 st at beg of next 6 P rows, P to last 2 sts, P2tog.
Cont straight (dec ONLY at neck-line) for 16 more rows and then cont dec ONLY every 2nd row.
Cont in this manner for 56 rows from where you changed needles, ending with a P side facing.
Cast off rem sts in K st

Sleeves (make 2)
Using smaller needles, CO 50 sts and work 1 row in K1, P1 rib.
Next row P
Next row K
Rep these two rows 5 more times (11 total rows) ending with a K row facing.
Inc row KFB, K to last st, KFB
Next row Beg with a K row, inc 1 st at ea end
Work 5 rows
Inc row
Work 5 rows
Inc row
Work 3 rows
Inc row
Work 2 rows
Inc row
Work 5 rows
Inc row
Work 3 rows
Inc row
Work 5 rows
Inc row
Work 2 rows
Inc row
Work 5 rows… 68 sts
Inc row
Work 3 rows
Inc row
Work 1 row
Inc row
Work 3 rows
Inc row
Work 2 rows… 76 sts
Shape top
Cast off 4 sts at beg of next 2 rows… 76 sts
Cont straight for 6 rows.
Work 1 row, ending with a P row facing.
Cast off rem sts (in K)
Making up
Press all pieces very gently , on WS, using a warm iron over a cloth.
Join shoulder seams. Set in sleeves, join side and sleeve seams. Add button and snap fastener.
30 comments:
Looks wonderful!!!
This is fabulous and modern....which yarn did you actually use?
Marilyn, the yarn was purchased in France 3 - 4 years ago and didn't have ball bands. It was an 8 ply and I uesd approx 700g (210y/192m).
You are back! I have been missing you! Your new jacket look very nice. Love the simple closing..
oh my...such talent, this has a lovely drapey look to it.Clever you!
What a fabulous design -- I love it! Thank you for posting the pattern.
That looks so elegant and comfortable!
The design looks quite chic, I'd love to see it fleshed out.
This is simple, chic and I want to knit it...
I really like this design. I found you via the Daily Knitter. Do you think this is too hard for a beginner (I have 3 projects planned already, so I doubt I could get to this until the winter, I am SLOW).
Thanks!
Hi Nora! I have nominated you on my blog...
Wonderful design. Thank you. But may I ask what yarn did you make it in, please?
Thank you for the pattern, it's a beautiful garment and cleverly designed, I am definetely making this! And I got just the yarn :-)
Your designs really stand out, they are so organic and elegant
all the best
meli
Wonderful pattern. I wonder what yarn Meli bought.
I LOVE this pattern!!! One question- what size will it fit, just approximately in the bust. Thanks so much!! I am looking forward to knitting it!!!!!
Thank you very much for sharing such wonderful patterns!
Very simple, but so elegant!
I just found your wonderfully simple yet chic pattern. What size does it fit? Can't wait to go yarn shopping !!
I'm also interested in knowing the sizes as I'm about a size 20/22. This style is perfect for me. Being a new knitter, I probably need more details than most. Any help expecially with completed measurements and which yarns are recommended would be really appreciated.
I would love to make your design as it is a beautiful cardigan and just my style, But I also am a larger bust size. Is there any other info on size and changes for them? Thank You for sharing.
What size does this make? With the number of stitches used to make the 2 front pieces and the 1 back and considering that 3 sts = one inch, it appears that it will be 61 inches at the hem.
So, I guess this pattern makes a size EXTRA LARGE? Right?
Do you have directions for a size medium or large? This is exactly what I have been looking for.
A U.S. size large=42" bust
U.S. size X-Lg = 45" bust
Will Stella fit?? Sophisticated, simple, perfect design.Please advise re: sizing ?
Has anyone actually knitting this cardigan??? I am having problems figuring out the sleeves, it doesn't make sense to only knit 6 rows at the end, is this correct??? I really love this pattern and am almost finished except for the sleeves
Anon, yes, myself and a few others have knit it. :) What seems to be the problem?
Can anyone answer the question on sizing? The pattern states that the finished size at its widest part is 26", but the stitch gauge does not match that for stitches used. Am I reading this wrong. Nora when u made I assume for yourself, what size did you consider it?
I am also confused about the sizing of this pattern. I'd like to make it in size "L".
Could someone please post the size that this pattern is written for?
Having read all comments, I cannot find the answer about size. Has anyone find what to do, since it seems, the author did not reply :(
Thanks
As soon as I saw this beautiful cardigan I wanted to knit it, but then I saw that there was no indication of sizing, and other people are talking about the same problem, with no answer. So I took a close look at the pattern this morning, and I’ve figured out enough for me to start work on it. No guarantees that I’m right, but here’s how I see it. First of all, the gauge is critical, and the numbers I’ve worked out are for the gauge shown in the pattern: # 11 needles giving 3 stitches and 4 rows to the inch; #10 needles giving 5 stitches and 5 rows to the inch. If your gauge doesn’t match those numbers, you’ll need to adjust all the numbers in the pattern. So here goes with my measurements.
(1) At the hem:
The back is 80 stitches on #11 needles, or 26 2/3”
Each side of the front is 50 stitches on #11, or 16 2/3” each
Total circumference at the hem is 59”
(2) At the base of the armhole, before the shaping starts:
The back is 70 stitches on #10 needles, or 14”
Each side of the front is 45 stitches on #10, or 9” each
Total circumference at base of armhole is 32”
The measurement at the base of the armhole is definitely too small for a size large, which is what I want,
but if I stay with the #11 needles, I’ll have 70 stitches at 3 stitches to the inch, or 23 1/3” plus the 18” from the front, for a total of 41 1/3” at the armhole. This should be a roomy large, with a swingy hemline. After all those words, what I plan to do is just stay with the #11 needles on the back, but switch to the #10 as instructed for the front.
(3) On the length, the instructions say to repeat alternating knit and purl rows for “approx 13 cm (19k rows)”. But 19 knit rows would be a total of 38 rows; and at 4 rows to the inch, that’s 9 ½”, which brings the total length up to 30”. However, if you keep it to 19 rows total, the length of the section will be about 4 ¾”, which is close to the 13 cm, and makes the total length come out at about 27 ½” as shown in the pattern.
As I said at the start, I haven’t knitted this yet, and there are no guarantees on my numbers, but I plan to make the changes I’ve listed, and I’ll comment again after I’ve done it.
Has anyone figured out the sizing of this gorgeous project? Can the blogger respond?
Post a Comment